The OnePlus 15 comes with a ton of cool features. From that 5th-gen Snapdragon 8 Elite processor to its massive 7,300mAh battery. It also uses a cool technology called Micro-Arc Oxidation to apply a ceramic-like coating to its metal frame. It feels great in the hand and should be pretty durable against scratches and everyday wear and tear. In this article, we’re going to tear this phone apart, see how the OnePlus 15’s internal engineering is, what’s inside, and how much of a hassle it is to repair.
So, to start, we need to remove the SIM card tray. If you look at the SIM card tray, you’ll see that it has a red rubber gasket around the opening.
Now we need to heat up the back cover; you can use a hair dryer or heat gun to loosen the adhesive underneath. Then you can open the back cover with a tool. I prefer a hair dryer because it’s less likely to damage the internal components with too much heat.
Here’s the fiberglass back cover. The glass on the camera lens can be replaced; just heat it up and pry it up gently. But if you want to replace the entire camera island, there are four Phillips screws on the side that you need to remove in order to replace the camera island. The camera island itself also has a series of antenna contacts that connect to the board via these gold pins. When opening the back cover, be careful not to put too much glue around the camera area, so you need to heat it up a bit more to get it open.(OnePlus: From “Flagship Killer” to Oppo’s Sibling)
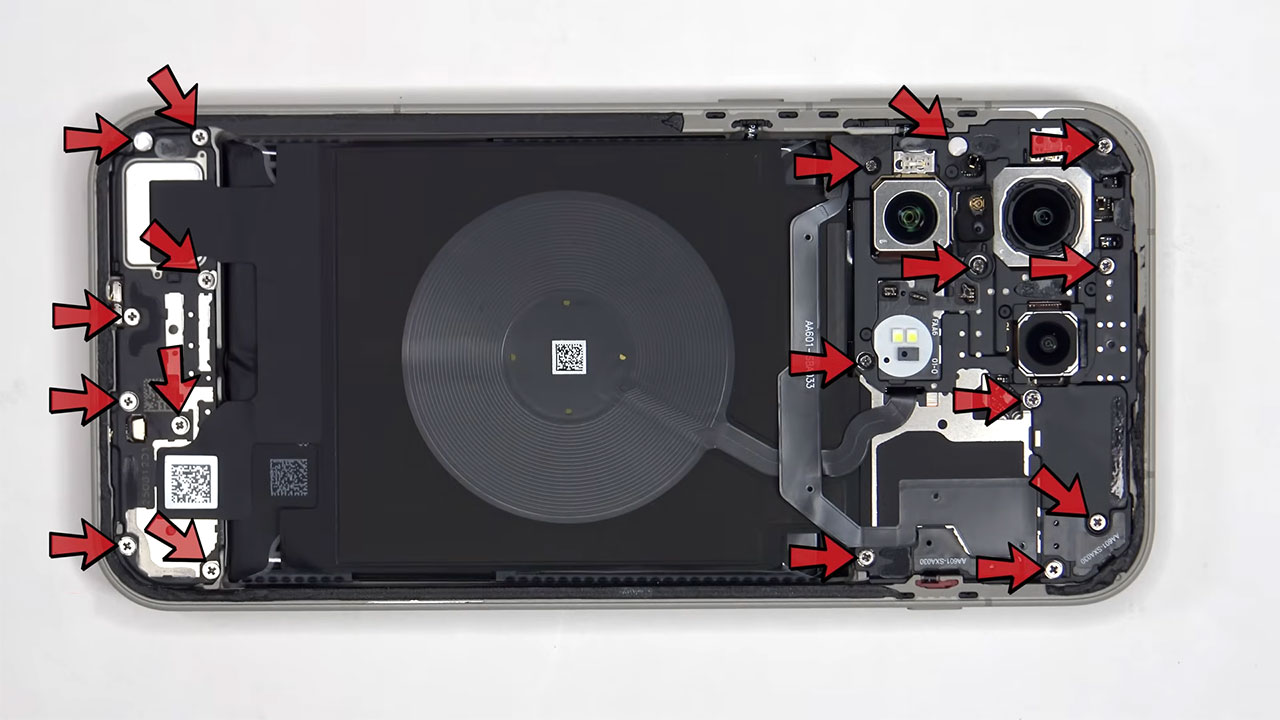
Here are 18 Phillips screws that need to be removed.
Now we can remove the wireless charging coil and that cover on the motherboard. But be careful, because there’s still a flat cable connected to the main board.
Okay, let’s take a closer look. Here we see the IR blaster, laser autofocus, dual LED flash, rear ambient light sensor, a few flat antenna cables (including the NFC antenna), and the wireless charging coil. There’s also a large layer of graphite film that helps with heat transfer. We’ll disconnect the battery cable first, then the rest of the cables.
Now we’re going to remove the battery. There’s a pull tab underneath to make it easier.
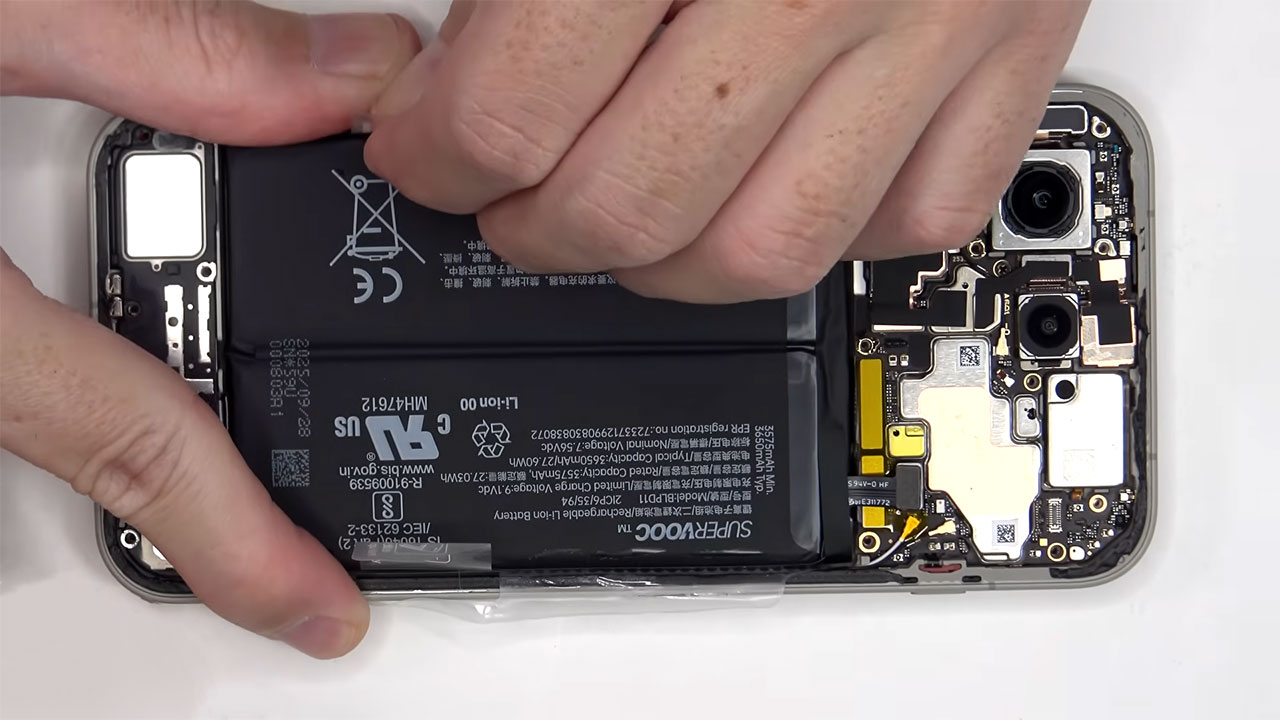
Here’s a better look at the 7,300mAh battery. It’s a two-cell battery that’s 15 percent silicon. Looking at the other side, we can see a rubber gasket around the battery connector.
The coaxial cables on the bottom right of the board can be removed with just a little pressure. There’s also a single Phillips screw holding the motherboard in place.
Let’s move on to the motherboard. Here we see the 50-megapixel main, ultra-wide, and telephoto lenses. The main and telephoto cameras also have optical image stabilization (OIS). There’s a second microphone hidden under that shield in the top corner. Copper tape and graphite film are also applied to the shields to dissipate heat. Rubber gaskets are also placed around the connectors. The camera cables are also easily removable. There’s also a metal shield over the main camera connector that pops out.
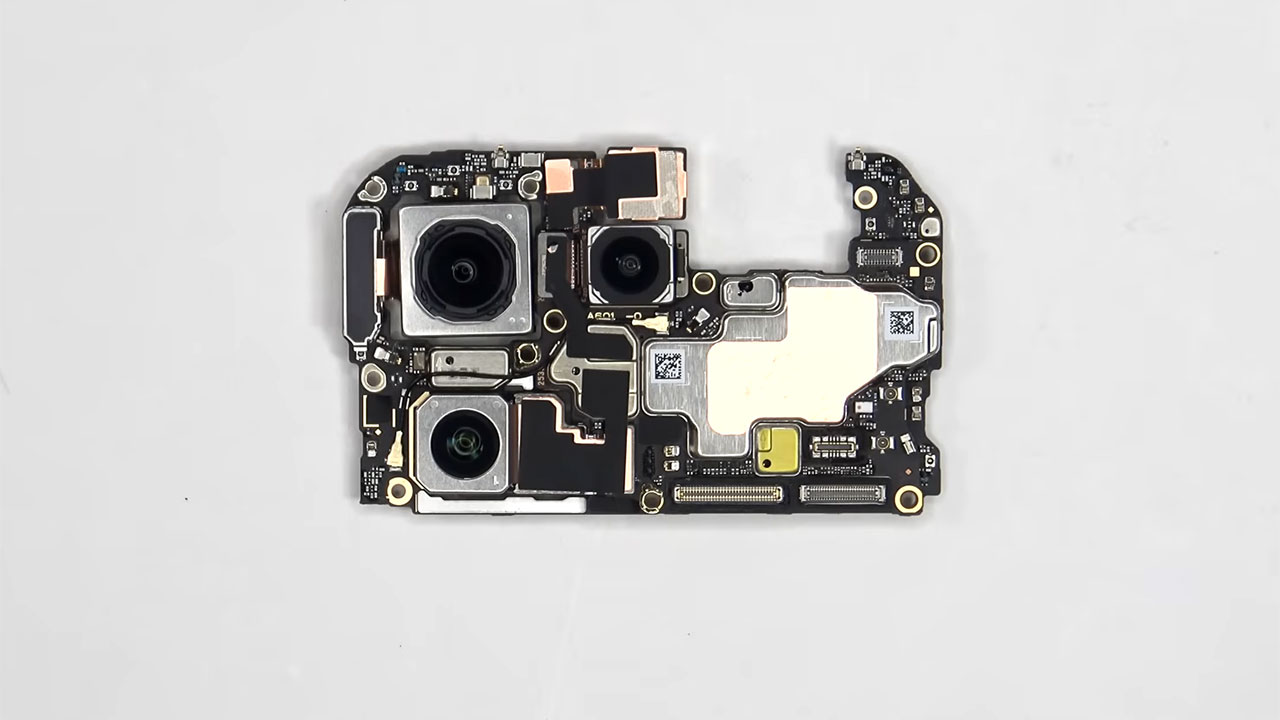
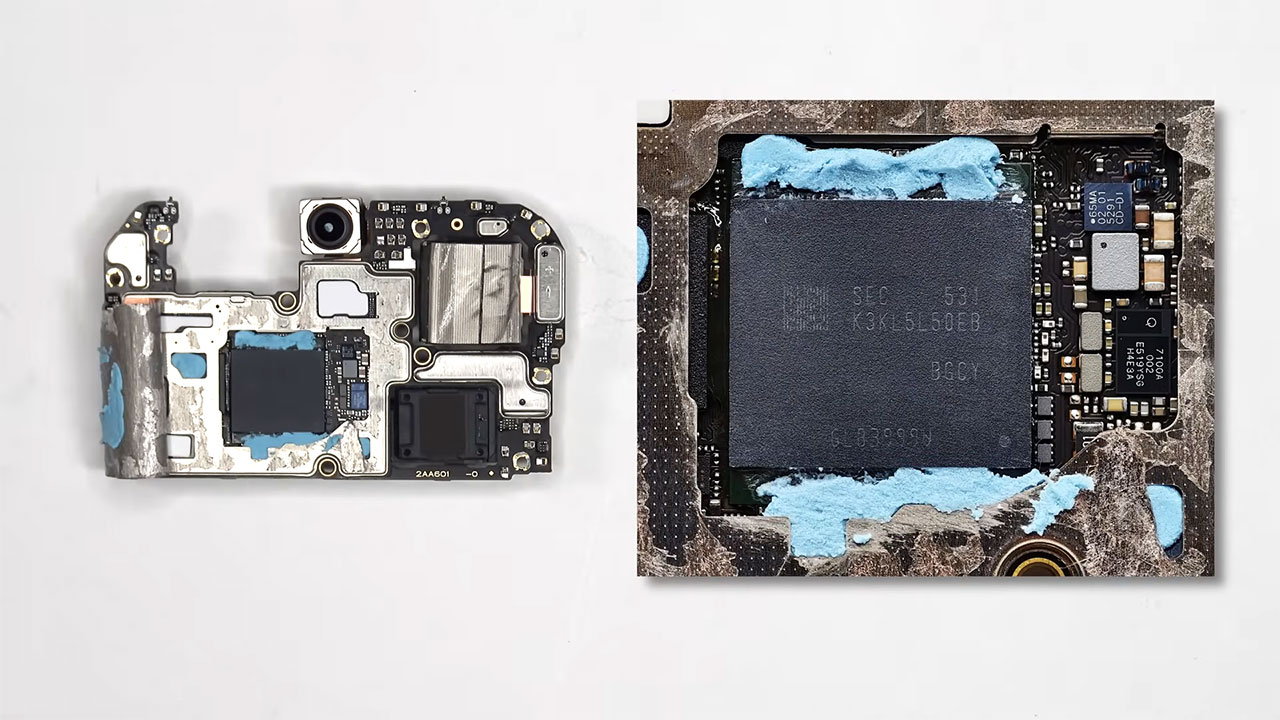
Now, there’s a sticker in the middle of the board covering a hole. When we cut it out, we see that they injected a thermal compound (silicone paste) between the two boards. This is a two-layer board. They did this so that the thermal paste could go between the two boards and reach the back of the processor and the components on that side, to better transfer heat from under those components. Let’s take a look at that side; we see the 32MP selfie camera. Again, there’s copper tape and copper film on the back shield and thermal paste for heat transfer.
When we remove the copper film, we see that they poured more thermal paste on the RAM, which is on the Snapdragon 8 Elite Gen 5 processor and internal storage. We also see thermal pads on these chips. Here’s a better look after the paste was removed.
Here’s the bottom speaker assembly. These two flat cables connect the main board to the bottom board, and the other one is the display board.
So if you want to change the screen, you have to open the back cover, remove the screws on the bottom speaker and the speaker itself to access the screen cable. Then you have to disconnect the flat cables and remove the bottom board to get to that rubber gasket next to the screen cable. Then you remove that red rubber gasket, heat the front of the phone (on the screen) to loosen the adhesive under it, remove the old screen, apply new adhesive and put the new screen in. Remember to pass the flat cable through that hole in the middle frame and close the phone again.
Let’s move on to the bottom board, or the charging port board. Here we see two microphones, one of which is under the shield. The charging port also has a red rubber gasket around it, and there are gaskets around these connectors. The SIM card tray is also on the other side.(Comparison of Galaxy S24 Ultra with OnePlus 12)
Here’s the linear vibration motor. It’s held in place with a bit of adhesive, so if you want to replace it, just apply some heat and gently pry it up. There’s also a rubber gasket and mesh filter over the speaker hole on the frame, and there are filters over the microphone holes.
If you accidentally insert your SIM card into the wrong hole (the microphone), you don’t need to worry. Both the filters and the microphones themselves sit over those holes and won’t be damaged. Plus, the microphone holes on this phone are shaped differently so it’s harder for people to mistake them for the SIM card hole.

Once we’ve removed the flat cables, we get a better look at that very large vapor chamber that runs under both the battery and the motherboard. This flat one is for the power button, and that one is for the volume buttons. If you want to replace any of these, you’ll need to lift those black plastic brackets out of the slots in the frame and remove them. If you want to replace the buttons themselves, you’ll need to lift those black plastic retainers and pull them out so the buttons are free and exposed. The same goes for the button on the other side. Both the speaker and proximity sensor board are held in place with adhesive, so if you want to replace them, just apply some heat and gently pry them off. For repairability, I give this phone an 8.5 out of 10. Okay, now it’s time to put the phone back together. Once everything is back in place, apply new adhesive and stick the back cover back on. Turn the phone over, turn it on, and that’s it!
Magnetic for OnePlus 15 Case

FNTCASE for OnePlus 15 Case
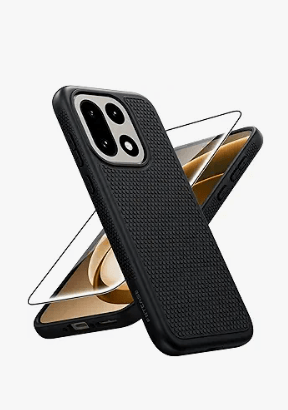
for Oneplus 15 Case Premium PU Leather Cover Retro